Background

Tuesday, January 26, 2016

How to Thin Cut

January 1st kicked off our newest Seasonal Expressions catalog and the introduction of our newest line - Thin Cuts.  These little beauties are metal die cuts that can be used with your own die cutting machine (I use the Cuttlebug) and work perfectly with a coordinating stamp set.

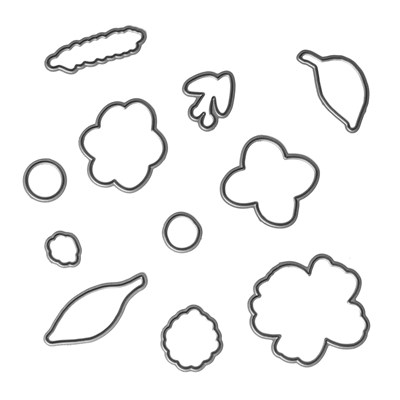
Here are the Spring Wishes Thin Cuts and coordinating Spring Wishes stamp set.  Notice the blue outline around some of the stamps.  Those lines let you know there is a coordinating Thin Cut set for this stamp set.  Pretty awesome, huh!

I've been playing with these Thin Cuts these last few weeks as I created the cards in our Charlotte Workshop Your Way kit.  I wanted to show you some of the things I have learned.

When using Thin Cuts in your die cutting machine you need a special plate or shimmy to create enough pressure as it runs through the machine.  I can only speak to the Cuttlebug as that is the machine I have, so let me tell you what I know.

To cut with the machine, you need a special C plate and unfortunately these plates are hard to find.  After much searching, I was finally able to order a rubber mat that is used as a C plate from Amazon.  See picture below.  Another trick would be to use an old non-CTMH embossing folder ;) instead of a C plate.  This would make the thickness what you need to press/cut the paper with the thin cuts.


In the picture you can see how to assemble the plates:
1. Plate A is the thickest mat and is a self healing mat. This will accept any cuts you make and help protect the other plates.
2. Place your paper on top of  Plate A and then the Thin Cut turned with the raised edge down onto the paper.
2. Next the C plate or rubber C mat
3. 2 B plates or 1 B plate, embossing folder, and another B plate. (If using a C plate or Rubber mat you don't need the embossing folder between the 2 B plates - this is an either/or).

While making the cards from the kit, I was reminded of the best way to create using watercolors and stamps and now the thin cuts and I thought I would share with you.

Originally I sat down and cut out all the images I would need.  I then stamped the coordinating images and finished with our watercolor paints. I noticed that the images weren't super clear and then remembered how much better the stamped images look when I stamp them after I watercolor. The watercolor makes the stamped ink bolder and brighter.

To make things easier on me, I decided to watercolor a strip of paper and then cut out the images I need:

I love creating streaked style instead of trying to make it super blended. This helps it look more natural and variegated instead of using simple, flat cardstock.


Here is a sampling of of the cut and stamped images.  The set on the left was water-colored first and then stamped.  See how clear the images are!  The set on the right were stamped first and then water-colored.  Big difference, huh!

Here are the completed cards.  Do you see the difference now?!


Tuesday, January 19, 2016

Where's our Winter Wonderland?

Every Christmas I just wait for the snow knowing that it must come, it's Christmas after all right?! Well if you are here with me in TN you know the weather around here is CRAZY! Christmas day and it was a whopping 70 degrees outside!!!  To help me remember what Christmas is suppose to feel like and look like, I took out some pictures from last February - pictures of snow and all the fun that comes with it!


If you purchased the White Pines paper, you most likely have some of this blue diamond paper stil available. Here I used that paper, the White Pines Complements and the beautiful white Glitter Paper and I was able to put this layout together super quick. I debated posting the layout because my photo just does not do the shimmer justice but trust me, the shimmer makes the photos pop and reminds me of the glimmer snow makes in the sun. The glitter paper definitely makes the layout!

Are you missing the snow?  What are you creating to help you feel like it is winter time?

Monday, January 18, 2016

Christmas with White Pines

It's hard to believe I have all of my Christmas pictures already on a layout and ready to go. Actually I found that I didn't take enough pictures this year (is that even possible?)  I love scrapbooking the even right after it happens as it always makes me feel so accomplished and ahead.  Have you finished your Christmas layouts yet?

Here are the layouts we created in my White Pines Christmas workshop.
This first layout was our main layout inspired by another consultant Dana Kessler but changed to include a hidden layout with the use of some flip flaps.


This picture shows the right side from the first picture with the flip flaps opened to reveal another  
12 x12 layout and the back of the first page.  Here is where you can see I definitely ran out of pictures.  Here's to hoping someone else took some pictures that I can have :)


This was our Workshop on the Go layout. I absolutely love the simplicity but yet still the detail of this layout.  The picture does not do it justice in my opinion.


For this workshop I had two different workshop options. The first layouts shown were down in the morning and then we had a Picture My Life (PML) workshop in the layout. This was a chance for everyone to learn out to use their PML cards in their normal scrapbooks.  We created the above two layouts as our Cover and End pages and then filled the pages in between with the PML cards and pictures from through out the month of December. My tip for PML cards in scrapbooking is make them your own.  You have lots of embellishments and bling - fancy them up.  Add detail, notes, ribbon, washi tape, you name it - add and and make it fun.  This type of scrapbooking could rock your world and get you back on track with Scrapbooking,

I am sad to say that these White Pines papers shown are retired and no longer available from CTMH.  However, try some of the techniques and ideas here with your own previously purchased CTMH Christmas paper - I know you have some :).

Happy Scrappin'!

Monday, January 4, 2016

Charlotte's Workshop Your Way coming to you!


An All NEW way to workshop!
Charlotte Workshops YOUR Way

With the welcoming in of our newest Seasonal Expressions book beginning January 1st, our Workshops on the Go have taken on a new look and a new name. Welcome Workshops YOUR way! 
  • Now each paper pack and Workshop Kit will come with 2 of  6 different double sides patterned pages instead of 4.
  • The Workshops Your Way will include the cardstock you need to complete the layouts shown.
  • No cardstock is included in the new Paper Packs.  
  • The Workshops Your Way Kits DO NOT include a stamp set. 
  • Each WYW kit will will create 3 scrapbook layouts, A Picture My Life pocket scrapbooking layout and a set of adorable cards using the leftover goodies in your kit.
On Friday, January 22nd at 6:30pm we will create the Charlotte Workshop Your Way kit just as it was designed so you can get a taste for how our new kits work.     


Workshop Options are:

Basic - $32:
Charlotte Workshop Your Way Kit which includes:

  • Charlotte Paper Pack - NEW
  • Charlotte Complements - NEW
  • Additional Cardstock
  • Black & Gold Ribbon  - NEW
  • Treasured Puffies - NEW
  • One sheet of the watercolor paper for cards

Better - $65:
Everything included in the Basic Workshop PLUS:
Spring Time Wishes Thin Cuts - NEW

and coordinating stamp set


CAN'T MAKE IT TO THE WORKSHOP - HOW ABOUT THE ALL DAY CROP THE NEXT DAY?
If you can't make it to the workshop Friday night, consider purchasing the kit and doing it on your own or with other at the crop the next day. I will be there to assist with any questions as you complete the kit.

To sign up for the workshop and to see more pictures of the workshop, check out my blog.

You must sign up for the workshop by January 10th.

View of the Pocket pages that can/will be made with Charlotte WYW kit.  

*Pocket pages protectors are not included in kit and will need to be purchased separately.