Here are the Spring Wishes Thin Cuts and coordinating Spring Wishes stamp set. Notice the blue outline around some of the stamps. Those lines let you know there is a coordinating Thin Cut set for this stamp set. Pretty awesome, huh!
I've been playing with these Thin Cuts these last few weeks as I created the cards in our Charlotte Workshop Your Way kit. I wanted to show you some of the things I have learned.
When using Thin Cuts in your die cutting machine you need a special plate or shimmy to create enough pressure as it runs through the machine. I can only speak to the Cuttlebug as that is the machine I have, so let me tell you what I know.
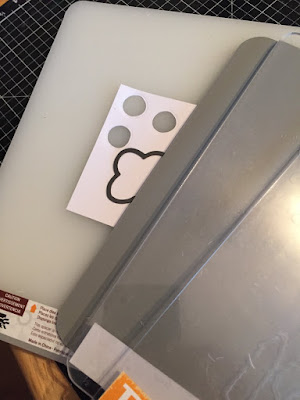
To cut with the machine, you need a special C plate and unfortunately these plates are hard to find. After much searching, I was finally able to order a rubber mat that is used as a C plate from Amazon. See picture below. Another trick would be to use an old non-CTMH embossing folder ;) instead of a C plate. This would make the thickness what you need to press/cut the paper with the thin cuts.

In the picture you can see how to assemble the plates:
1. Plate A is the thickest mat and is a self healing mat. This will accept any cuts you make and help protect the other plates.
2. Place your paper on top of Plate A and then the Thin Cut turned with the raised edge down onto the paper.
2. Next the C plate or rubber C mat
3. 2 B plates or 1 B plate, embossing folder, and another B plate. (If using a C plate or Rubber mat you don't need the embossing folder between the 2 B plates - this is an either/or).
While making the cards from the kit, I was reminded of the best way to create using watercolors and stamps and now the thin cuts and I thought I would share with you.
Originally I sat down and cut out all the images I would need. I then stamped the coordinating images and finished with our watercolor paints. I noticed that the images weren't super clear and then remembered how much better the stamped images look when I stamp them after I watercolor. The watercolor makes the stamped ink bolder and brighter.
To make things easier on me, I decided to watercolor a strip of paper and then cut out the images I need:

I love creating streaked style instead of trying to make it super blended. This helps it look more natural and variegated instead of using simple, flat cardstock.

Here is a sampling of of the cut and stamped images. The set on the left was water-colored first and then stamped. See how clear the images are! The set on the right were stamped first and then water-colored. Big difference, huh!
Here are the completed cards. Do you see the difference now?!


love these die and stamp sets. enjoyed watching Carole and Zada made these cards at the Saturday crop. need some ;)
ReplyDelete