Background

Showing posts with label Art Philosophy Cricut Cartridge. Show all posts

Friday, July 29, 2016

It's almost GONE!!!

Yep, I am still here!  Have you ever felt like life was not your own?  I sure do - all the time and truly my life is not my own. It is first God's, then my husbands, my kids and my extended family.  Right now I live to serve -  to serve all those mentioned above and to serve my dad. My dad was recently diagnosed with Hodgkins Lymphoma, Stage 3 and is undergoing Chemo treatments to help him fight this horrible cancer. I have been taking him to every dr's appointment, chemo treatment, meeting... you name it and it has taken over my life but I will tell you this - I AM SO BLESSED! So what that it has taken over my life!  I get to spend every moment serving my mom and dad who have served me my entire life.  It's my turn and there is no place I would rather be - well maybe the beach but that will come sometime. :) This can't wait and I am so glad I can be here.  In fact, I am writing to you today from The Vandy Cancer Clinic as my dad has his 2nd round of Chemo. And I get to be with him! :)


Ok, sorry for that long drama but I wanted you to know that I am still here, I do still love papercrafting but life puts things on hold sometimes.  However, I did want to remind you that in just a couple days there will be a disappearing at Close to My Heart.  The 2015-2016 Annual Inspirational Catalog will retire and with it all the paper packs and several colors will go with it.

Here is just a small sampling of what will be going away:

Several of our favorite colors are retiring in the Adventure line:

Hollyhock
Topiary
Honey
Gypsy
Sunset
Cotton Candy
Pear


We also have 3 Cricut Collections retiring:

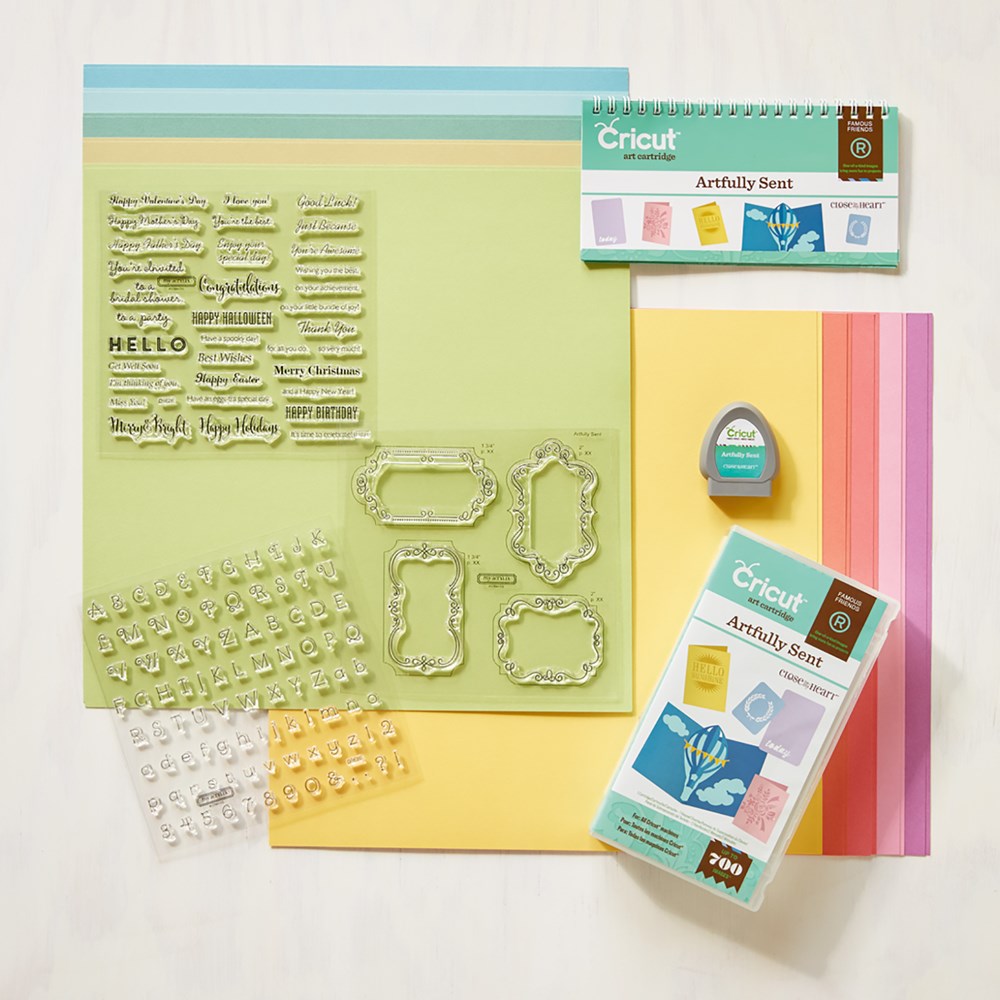
Artfully Sent                            


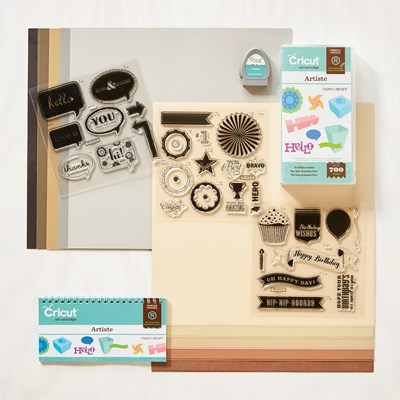
Artiste
product image

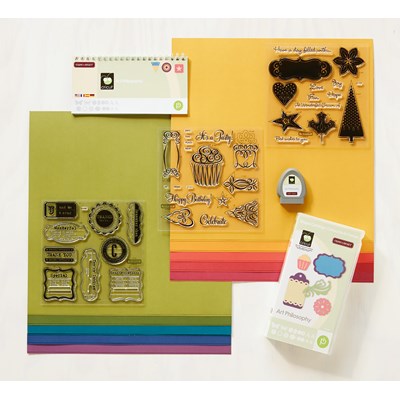
and our very 1st cartridge: Art Philosophy

product image

There are so many other items retiring and you don't want to miss out. Check here now to see everything and get those items on your wish list before they are gone.

While you are there, check out my new website!  It's awesome and now mobile friendly!  Please make a note that the web address has changed slightly too. It is now: www.heatherhicks.closetomyheart.com. 
 The old site will direct you to the new site for a little while but please save it to your favorites :) before you forget. 

Happy Scrappin'!!


Tuesday, December 16, 2014

Rudolph Says Merry Christmas!

I am sure none of you are like me but it seems like my brain has left me recently, leaving me to forget everything until the last minute or not at all.

As we all know Christmas is coming soon - and I mean soon!  Since we homeschool that typically means we don't have the normal school parties and craziness most families go through. However, since we are involved in two tutorials that changes things a bit.  I had been working on the teachers gifts and was about done when the kids asked me what they were giving their friends - their friends!  Augh! I totally forgot!   Luckily my two youngest are still pretty young and I was able to throw these gifts together uber quickly!


To make the heads I used the Artiste Cricut Cartridge and cut out the Owl head. I placed a circle in the bottom of the owl and sliced it out.  The "antlers" are the branches from a tree on the Art Philosophy Cricut Cartridge.


Dash loved hammering in the embellishments for the eyes while

Tinker Bell added googly eyes to her Rudolph

I thought they turned out pretty cute for being so simple and coming together so fast.  Give it a try and see what you can create out of the ordinary with our cartridges.  The options are endless!  Don't forget to share what you create!

Friday, May 9, 2014

Another Fabulous Retreat

At this time last week I was scrapbooking with a bunch of amazing ladies in the hills of Scottsboro,  AL. What has become our bi-annual scrapbook treat is an event that we all look forward to.
To welcome the girls when they arrived I had made these simple little gift buckets for each person in or group.  The little tags were simply copied from the Art Philosophy Cricut Cartridge instruction section on the booklet but changing the card as shown to a simple tag and changing the colors to fit the spring time event. 
Each night during the retreat I lead one simple workshop to give everyone something fun to make,  maybe outside of their box,  but something fun that we can take away with us.  Thursday night we made these cute gift bags with our Muslim bags. We simply stamped on the bags using our pigment inks and attached a cute flower also cut from the Art Philosophy Cricut Catridge and used our quilling tool to form the flower.  A couple glue dots, a little ribbon and viola, a cute gift bag ready for Mother's Day, Graduation,  a wedding or whatever you may need a little gift bag for.   I love giving gift cards in something this simple to create - it just makes the gift card seem a little more planned and thought about. 


Here is another one I did at Christmas. Easy Peasy. Just stamp the initial of the person you are giving it to in the inside of the wreath and your gift tags is taken care of too!
Have you used these Muslim bags?  If not, order yours today and let me see how you decorate yours up. 

Wednesday, April 30, 2014

Christmas Isn't The Only Time for Gift Giving

Christmas is definitely the #1 time to give gifts but May and June are right up there too!  Between teacher gifts, graduations and weddings it seems like we are always trying to come up with some quick gift ideas.  Over the next couple days I hope to show you some of the quick gift items I have put together for some various events.

Here are some quick teacher gifts for my children's homeschool co-op teachers.

6 Women and 
1 Man :)


All the containers were made with the Artiste Cricut  Cartridge.  The lady's baskets were made with the Laughing Lola papers and the Art Philosophy Stamp Sets.  This last gift box for the one gentleman teacher was made with the Scholastic papers and the April Stamp of the Month Balloon Talk.   These baskets were quick to put together and relayed the message of thanks to all who poured themselves into my children's lives.

Sunday, March 30, 2014

Lollydoodle part 2 and Timberline


I meant to upload these pictures of our Lollydoodle workshop earlier but....  well, you know, life!  Life is good, just busy.  Here are the layouts we created during our Lollydoodle workshop a few weeks back.  These are such fun papers!

The Workshop on the Go:
2nd Layout created using the leftovers from the WOTG:

That same day but later in the afternoon we held our Timberline workshop.  I absolutely loved both workshops in the WOTG so those were the layouts we created. 


This paper is awesome for those masculine layouts or outdoor fun.  Both these layouts were used to scrapbook our adventures last summer at Camp BaYouCa in NY.  It is a camp that I attended every year growing up - I was so excited to be able to take my family back there for them to enjoy it.  They haven't stopped begging to go back since we left.  :)

Friday, July 26, 2013

Thank you cards Plus a storage idea...

OK, so here are the last of the thank you cards that I made for my husband.


This one was made with our retired Aspen papers. Very simple. I just did a color block pattern using our Originals Card Idea Book (love that book).  Quick side note - the Originals Card Idea Book (#9030) and our other beautiful Idea Books have been retired but are being brought back beginning August 1st!!! WOOHOO!!  They will be a more affordable soft cover and spiral bound book.  These books are AWESOME!!!  Sketches of cards and layouts from the wonderful founder of Close to My Heart, Jeanette Lynton. These sketches are the foundation to the layouts and cards I make.   Ok back to the card :). I added a simple tag with the word Thanks stamped inside and "hung" a couple pieces of scrap ribbon from the tag. Buttons completed the card for a little more accent and pop.

 This second card was used with our Buzz and Bumble papers. I love these papers. I recently completed an entire heritage album with these papers!  The colors lend themselves for a heritage look but also with a pop of color from Sunset making it absolutely beautiful! Here on this card I just added two strips of B&T paper (patterned paper) going down the card with a zip strip between the papers. On top of the Zip strip I added a piece of colonial white zig-zag ribbon.  For a change, I took my square sentiment box and turned it at an angle and stamped my sentiment inside. The flower is a stamped image from the Buzz & Bumble Workshop on the Go stamp set, colored in with our Sunset Alcohol markers and a few Basic Opaque Pearl Gems inside.  To complete the card I added two cocoa ribbon pieces at the bottom of the card with Colonial White buttons and our Baker's Twine Harvest Assortment stitched in the buttons.

This card was made very simple as I knew there was one or two people in his office who don't like "all the extras". I used some of our older and retired papers and cut a the sentiment box from our Art Philosophy Cricut Cartridge.  Added a piece of Coca ribbon, a 3D Foam piece behind the sentiment box and walla - done!  Easy- Peasy!

This last card was created using one of our retired clear cards.  I love these cards but it is hard to show what I did through the picture.  I will do my best to explain. The card itself is completely clear so you have to build the card out knowing you are going to see all sides of the card.  I love our B&T papers for this because their is a pattern on both sides so their is never a boring side to see :).  On this card I used our For Always papers as the base. I used the paper on the inside base of the card with a zip-strip (the little strip at the top of our B&T papers that has a pattern to use for a border on one side and the other side has the name of the paper pack and colors in the pack used) at the bottom of the B&T paper. Then a piece of sky cardstock at the very bottom of the inside base. On the sky cardstock I stamped the thank-you sentiment.   This repeated thank you and the other thank you sentiments on the other cards were stamped using the Thank you stamped set.  On the top flap of the card I just cut out a 3x3 white daisy sentiment box and backed it with some sky cardstock.  I stamped out the world Thank with our alphabet stamps - I love that they are clear and I can see exactly where I stamp the letters for perfect alignment.   For the "u" I used one of our dimensional element u's and rubbed it in our sky inkpad and attached it with our liquid glass adhesive - love that stuff too!  Best adhesive ever!!!   Then I just added a little black ribbon and sparkle button for a final touch at the top of the sentiment box.  Directly under the sentiment box on the inside of the card, I added a white daisy journaling square to write a small note to the recipient.  Even though the card is clear,  because I put it directly under the sentiment box on the top of the card, you can't see the journaling box until you open the card.

Our clear cards came with clear acetate envelopes too so I just added another small piece of the zip strip to the envelope flap to tie it all together.

So, there are all the cards I made for my husbands Ukrainian trip. I hope you liked them!

Before I say goodbye though, I wanted to show you this wonderful idea that was share with me recently by another consultant - Tina Sutton.  I don't know about you but I attend a lot of crops and retreats and like to take with me as much as I can for my events so I never feel like I am needing something that I have at home but don't have it with me.  Close to My Heart carries these fabulous stackable plastic organizers to keep everything together and I love them!  

Here is a picture of our large organizer:
 You can fit up to 40 stamp set in it for quick pick up and go and great storage.  Here is the medium storage organizer:


This holds our ink pads, embellishments, and so much more.  The dividers are removable for larger openings inside for even great versatility.  OK, so I love these but what makes them even better is our Exclusive Inks Storage Case.

This case can actually hold one large organizer or our medium and our small organizer together for quick and easy carrying to crops and retreats.


Love this!!!  So quick and easy to go.  However, these cases are retired and will sell out quickly so if you like this idea for quick packing and easy carrying - get yours now!

Saturday, September 15, 2012

Chalk Adds a Little Pop to your House

I was so excited to get a little time today to straighten up the house.  Many people wouldn't believe this but I actually LOVE to organize.  It gives such a feeling of accomplishment and order when everything is in their place and there is a place for everything!

I didn't have a lot of time but I did have enough time to organize the pantry which I have been severely needing to do.  We buy a lot in bulk (with 4 kids and a husband who is 6'5" you would too!) so I definitely need a good way to organize it all. 

So, I ran to my neighborhood Ross, bought these great air tight jars and got to work.  As I was working, I grabbed my little label maker and started labeling the containers since a lot of the items look alike.  BUT, then I stopped and thought - I can do better!  I ran upstairs to my scrapbook room and grabbed a sheet of  Close to My Heart's Chalkboard paper.


I used the Cricut Art Philosophy cartridge and our new Chalk marker and got to work. This is a small sampling of what I made - the lighting wasn't great to show you the whole pantry.


The best part of the full sheets is that you can cut them to any shape you want and with the cricut cartridge you can, of course, change the size of them.  For my cabinets I made some smaller ones for my little jars and some more of the size shown for my bigger items. When my husband walked in and saw what I did, he immediately commented on the stickers and how much he liked them. He even took me out tonight to find some more jars to label and organize with.  :)

Monday, September 5, 2011

It's all about the "Elemental"

Happy Labor Day to you all!  I hope you were able to relax a bit - is that an oxymoron Labor Day/relax a bit ? :)  I don't know but I do know that we needed a bit of time to relax and though I didn't get to do it as much as I would have liked but I'm thankful for the time that I got.

I wanted to post some pictures of the last weekends workshop using the new Elemental papers.  This workshops uses the new Art Philosophy Cricut Cartridge for the base and for the beautiful roses that "pop" out. Now, I promises that I wont have the amazing Art Philosophy Cartridge in all of my layouts or posts but the beauty of what it can do is absolutely awesome!!!

Here is the first layout (and actually the only layout we created due to time), the Workshop on the Go.
It is hard to see all the detail in the pictures but I honestly have to say it is beautiful.  The roses were stunning and a great addition, however, they do lend to your layout not laying flat in your album very well.
We moistened them with a spray bottle of water and bent the edges down with our tweezers to help them lay a little "flatter" but they are probably more appropriate for a home decor item or gift.  I have also seen an amazing topiary plant created with these.   Give it a try and email it to me at HeatherHicksCTMH@gmail.com and I will have a gift for you.   

Here is the second layout I created.  I used the new Elemental Dimensional Elements and Magic book for the layout. I love how CTMH has changed their old stickease to now not just stickease for each kit but sometimes dimensional elements, linen sheets, rub-ons and so much more. Don't over look them in the book - there are so many options now. Also, one really cool feature about the Elemental paper is that each color/B&T paper piece will coordinate with one of the other new paper packs from the Fall/Winter Idea book.  This makes the Elemental paper a great pack to have on hand to add another "pop" of color to you other layouts.


Tuesday, August 9, 2011

New Cricut Images

I hope you are as excited about the new Cricut Art Philosophy Cartridge as I am! This is going to make scrapbooking, card making and gift giving soooo much easier! I love the fact that CTMH has labeled all the stamp images the size the cuts need to be in order to have the Cricut cut it and you stamp the image. This will save so much time instead of having to cut all your images out and their is no guess work. We will know exactly what size to cut each image out - yeah!!!


I have had several people ask me about the different 700 that can be cut on the cricut so I thought it would be good for me to post a picture of all the images. Hope you find several you like and can use!!!