Background

Showing posts with label Artiste Cricut Cartridge. Show all posts

Friday, July 29, 2016

It's almost GONE!!!

Yep, I am still here!  Have you ever felt like life was not your own?  I sure do - all the time and truly my life is not my own. It is first God's, then my husbands, my kids and my extended family.  Right now I live to serve -  to serve all those mentioned above and to serve my dad. My dad was recently diagnosed with Hodgkins Lymphoma, Stage 3 and is undergoing Chemo treatments to help him fight this horrible cancer. I have been taking him to every dr's appointment, chemo treatment, meeting... you name it and it has taken over my life but I will tell you this - I AM SO BLESSED! So what that it has taken over my life!  I get to spend every moment serving my mom and dad who have served me my entire life.  It's my turn and there is no place I would rather be - well maybe the beach but that will come sometime. :) This can't wait and I am so glad I can be here.  In fact, I am writing to you today from The Vandy Cancer Clinic as my dad has his 2nd round of Chemo. And I get to be with him! :)


Ok, sorry for that long drama but I wanted you to know that I am still here, I do still love papercrafting but life puts things on hold sometimes.  However, I did want to remind you that in just a couple days there will be a disappearing at Close to My Heart.  The 2015-2016 Annual Inspirational Catalog will retire and with it all the paper packs and several colors will go with it.

Here is just a small sampling of what will be going away:

Several of our favorite colors are retiring in the Adventure line:

Hollyhock
Topiary
Honey
Gypsy
Sunset
Cotton Candy
Pear


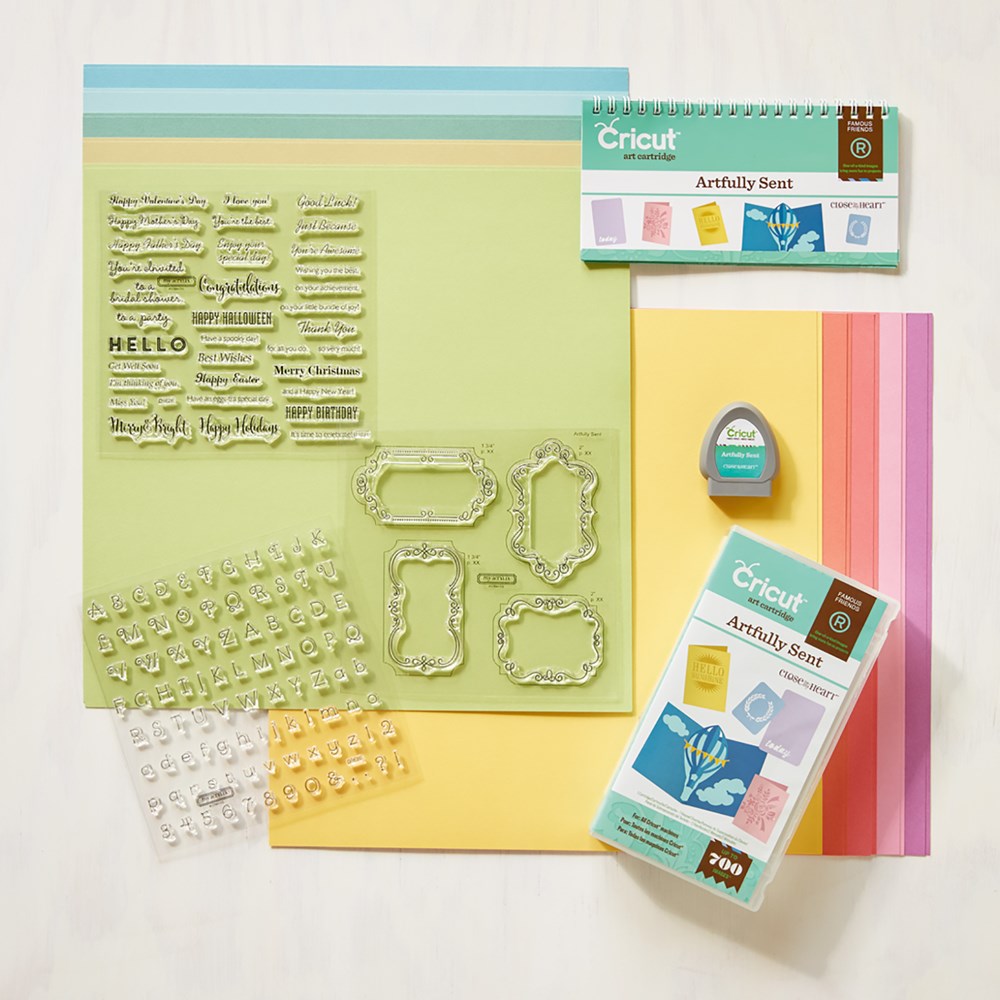
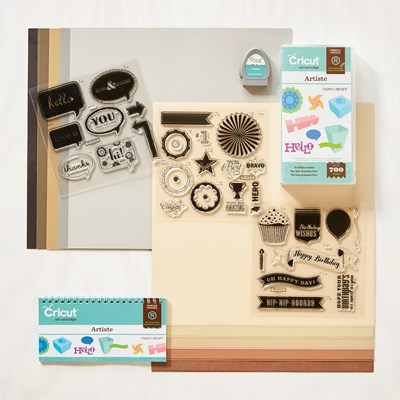
We also have 3 Cricut Collections retiring:

Artfully Sent                            

Artiste
product image

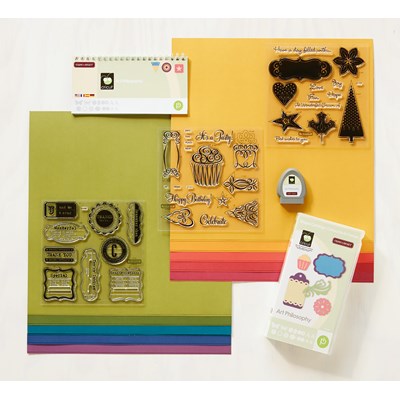
and our very 1st cartridge: Art Philosophy
product image

There are so many other items retiring and you don't want to miss out. Check here now to see everything and get those items on your wish list before they are gone.

While you are there, check out my new website!  It's awesome and now mobile friendly!  Please make a note that the web address has changed slightly too. It is now: www.heatherhicks.closetomyheart.com. 
 The old site will direct you to the new site for a little while but please save it to your favorites :) before you forget. 

Happy Scrappin'!!


Monday, March 28, 2016

What are you working on?

I get asked all the time what projects I am working on and though I would love to answer with the latest layout I can show off, I am a mom to start with and am usually working on something a little less luxurious then fun layouts but rather homeschool papers and tests.  However, last week I was given the opportunity work on something fun - the invitation for my daughter's birthday party.  She loves to cook so we decided on a Cupcake Wars themed party. No, not a war where you throw cupcakes at one another (which my youngest son with earnestly hoping for :)) but a bake off to see which team could create the tastiest and best looking cupcakes.

So anyway, here are the invitations...


Aren't they cute!?!  I love how they turned out!  I used Close to My Heart's Artiste Cricut cartridge to cut out the cards and pieces and fancied them up with  lots of  Gems, Sparkles, a little rick rack, and my favorite but retired - Liquid Applique.  This stuff is awesome. You squeeze it out and it looks like paint but when you heat it up it puffs up.  It gave it a great icing feel.

Once I got those invitations knocked out, I was off to work on my son's high school tutorial's formal invitation.  I had this great idea and in my head it would be so easy.... in my head.  Let's just say these were not the easiest invitations to make but they didn't look that difficult in the end either - trust me - it was all in the process!


The theme this year was Once Upon a Time as many of the seniors love and visit Disney as often as they can.  It's hard to tell it in the picture but the wording was done in silver foil and the castle was heat set in blue foil.  It's this new technique I learned about where the Deco Foil will adhere to anything printed in toner once put it through a laminator.  Though this is technically the truth, it helps if your font is larger then what mine was. After having the invitations specially printed and then foiling at home, the foil didn't adhere perfectly each time so I had to redo these a few times (ok a lot).  Once I finally got the foil to stick, I stamped the fireworks using the retired stamp set "It's a Party"  and heat embossed them in silver embossing powder.    I love that I can use my older stamps and supplies any time.  

What have you been working on?  Anything fun?  I'd love to see!  Anything with our amazing Cricut cartridges?  Don't have the one you want yet - just wait there is a great deal coming in April that might just help you get one.  Keep posted....

Wednesday, October 7, 2015

More from Urban

I finally finished my layouts for the Urban Workshop and wanted to share them with you.

In addition to the main layout shown in my previous post, we will create these two layouts:


and

Don't have any barn photos, that's o.k.  Create your own title - On the Farm, Country Escape, Dad's Retreat, etc.  Make it your own for both layouts!

As a reminder, our Urban Workshop is on October 24th at 2pm.  Workshop options are:

Basic $25:

Typed colored instructions for all additional layouts
Urban Paper Pack
Whisper Twine (just enough for the layouts)
Urban Complements

Better: $38:

Typed colored instructions for all additional layouts
Urban Paper Pack
Whisper Twine 
Urban Assortments
Urban Complements

Best $45:

Typed Colored instructions
Complete Urban Workshop on the Go kit from Close to My Heart including the Urban Stamp Set
Urban Complements

You must RSVP, using the PayPal link to the right, by October 10th to guarantee your supplies will be here on time.  

Can't make the workshop but still want the kit, that's fine. Just sign up using the PayPal link as well, but make sure to put a comment in the box to let me know. Once I receive payment, I will message you regarding how to get the supplies to you or you can purchase them on my website yourself. 

**It is always good to have extra White Daisy and Colonial White cardstock on hand when ordering the workshop supplies directly on my website as I include extra sheets in kits done in class. **

Tuesday, December 16, 2014

Rudolph Says Merry Christmas!

I am sure none of you are like me but it seems like my brain has left me recently, leaving me to forget everything until the last minute or not at all.

As we all know Christmas is coming soon - and I mean soon!  Since we homeschool that typically means we don't have the normal school parties and craziness most families go through. However, since we are involved in two tutorials that changes things a bit.  I had been working on the teachers gifts and was about done when the kids asked me what they were giving their friends - their friends!  Augh! I totally forgot!   Luckily my two youngest are still pretty young and I was able to throw these gifts together uber quickly!


To make the heads I used the Artiste Cricut Cartridge and cut out the Owl head. I placed a circle in the bottom of the owl and sliced it out.  The "antlers" are the branches from a tree on the Art Philosophy Cricut Cartridge.


Dash loved hammering in the embellishments for the eyes while

Tinker Bell added googly eyes to her Rudolph

I thought they turned out pretty cute for being so simple and coming together so fast.  Give it a try and see what you can create out of the ordinary with our cartridges.  The options are endless!  Don't forget to share what you create!

Sunday, September 21, 2014

3 Layouts, 2 Hours

This weekend I was blessed to host a 2nd Seaside Workshop at my house.  We created 3 different layouts, one from the Workshop on the Go (WOTG) and 2 original layouts.  To help save everyone time and be able to enjoy each others company a little more, I pre-cut the papers for all the layouts before our workshop.

The colors from our Seaside papers are absolutely beautiful and absolutely help you feel the heat of summer.

 http://heatherhicks.ctmh.com/Retail/Search.aspx?SearchValue=seaside
I showed you the WOTG layout before but here are the other 2 we created:


Monday, September 15, 2014

Mom, I Need a Gift Tomorrow!

How many times have you heard this, or  like I did, heard it 2 hours before going to bed?  How many times have you done that to yourself where you totally forgot about an event until the last minute?  I hate to admit it but it seems this regularly happens at my house.  I'm starting to think it is because they know I will help them out but what if I didn't?  Would they get better about remembering earlier?  Who knows but I hate to not have a gift when one is needed and/or deserved.

ANYWAY,  so this conversation happened just the other night, just 2 hours before bed and our event was first thing in the morning.  This is where I love having lots of supplies in my craft room.  :)  A few months ago I showed you the lipstick holder key chains that I made for my roommates at convention and how I added our Base and Bling to decorate them up. I had a few supplies left and was able to make this cute key chain in about 5 minutes - love that!

The recipient loves to take pictures so I thought the little camera charm would be a great addition.

Being last minute, I, of course, didn't have a small enough gift bag so grabbed my Artiste Cricut Cartridge and some extra Laughing Lola paper (love that paper) and made this gift box and card.  The box itself took longer to cut on the Cricut then it did to assemble!  My daughter was very amazed at how quickly it all came together.  Again, I'm not so sure that is a good thing :).
  
 Have you tried the Base & Bling collection yet?  It really is awesome and can be used for so much more then just jewelry and key chains.  Add it as an embellishment to your layout.  The sticker sheets come with several different stickers to choose from - add several to your layout.  Show off your Base & Bling art by posting it here and/or on our facebook page.  I would love to see it!


Sunday, September 7, 2014

Family is Forever

This last month has been filled with lots of family memories and highlights.  1 funeral, 5 family birthdays, 1 anniversary and 1 family trip.  Our September stamp of the month, Family is Forever, was the perfect stamp set to help us celebrate my parents anniversary.  They have been married for 45 years and I think that is something big to celebrate.  Here is the card I created for them.

Get your hands on this stamp set for only $5 in September with your $50 purchase.  Shop here now.  And while you are there, remember you can get our 30 Years of Happy stamp set with your $30 in stamp purchases during the month of September while we Celebrate National Stamping Month. Isn't this set adorable?!?

Wednesday, April 30, 2014

Christmas Isn't The Only Time for Gift Giving

Christmas is definitely the #1 time to give gifts but May and June are right up there too!  Between teacher gifts, graduations and weddings it seems like we are always trying to come up with some quick gift ideas.  Over the next couple days I hope to show you some of the quick gift items I have put together for some various events.

Here are some quick teacher gifts for my children's homeschool co-op teachers.

6 Women and 
1 Man :)


All the containers were made with the Artiste Cricut  Cartridge.  The lady's baskets were made with the Laughing Lola papers and the Art Philosophy Stamp Sets.  This last gift box for the one gentleman teacher was made with the Scholastic papers and the April Stamp of the Month Balloon Talk.   These baskets were quick to put together and relayed the message of thanks to all who poured themselves into my children's lives.

Sunday, March 30, 2014

Lollydoodle part 2 and Timberline


I meant to upload these pictures of our Lollydoodle workshop earlier but....  well, you know, life!  Life is good, just busy.  Here are the layouts we created during our Lollydoodle workshop a few weeks back.  These are such fun papers!

The Workshop on the Go:
2nd Layout created using the leftovers from the WOTG:

That same day but later in the afternoon we held our Timberline workshop.  I absolutely loved both workshops in the WOTG so those were the layouts we created. 


This paper is awesome for those masculine layouts or outdoor fun.  Both these layouts were used to scrapbook our adventures last summer at Camp BaYouCa in NY.  It is a camp that I attended every year growing up - I was so excited to be able to take my family back there for them to enjoy it.  They haven't stopped begging to go back since we left.  :)

Monday, July 22, 2013

Thank you cards take 2

Here are a couple more cards that I created for the sponsor of my husband's mission trip to the Ukraine.

This first card, I have have shown before but I made a few changes to it.  If you remember this is our Avonlea papers that are currently available.  This card was made using one simple cut from the Artiste Cricut Cartridge.  It folds up in half allowing a note or gift card to be tucked inside.  To make this card a little different, instead of using silver shimmer trip, I used our soon to be released bronze shimmer trim and an Antique Copper Designer Brad in the center of the flower at the top where the card closes. To embellish the envelope, I simple added a strip of paper to the bottom of the closer and added an adhesive backed badge button from the Wrangler assortment.

This second card was used with our retired Cherry-O papers and embellishments.  I made the Chocolate and Ruby cardstock scalloped borders with our corner rounder by taking off the guide and putting the paper flat in the punch instead the corner. We have a new corner rounder punch and a new scalloped border punch coming out in our new Fall and Winter Catalog on August 1st so check back soon to see them.  The new corner rounder will make a more wavy look while the scallop punch will give you more of the look shown here.  If you already have a corner rounder, give this a technique a try in the mean time.  The Thanks a Bunch was stamped using our Thank You stamp set.

This final card I will show you today was made with our current Chantilly papers. I cut two small strips of paper and dove-tailed the ends to make them look like ribbon. I again stamped the sentiment using the Thank You stamp set.  For embellishments, I used a butterfly from our Just Bloom Flutter Paper Shapes.  I love these because you can sponge ink on them for a soft subtle look, rub them in ink for a much brighter look or leave them as they are and they are simple and beautiful too.   I rubbed a little cotton candy ink on the corners of my butterfly to help it stand out a little and put a 3D foam  under it too for added dimension..  Below the butterfly I cut off a small flourish to give a little sparkle and have it look like the trail of the flying butterfly. As a final touch, I added sparkles and Pink Glitter Gems to give the card a final pop.


I hope you liked the cards.  In the next couple days I will post the final cards I made so keep checking back.

Friday, July 19, 2013

Close to My Heart Textiles in Ukraine?

Last month as I was preparing for convention in Disney, my daughter made some cute Mickey ears for me to wear for one of the events.  I showed the picture of the ears in a earlier post but the use of the Mickey ears did not end in FL. My husband recently went on a missions trip to the Ukraine with Mercy's Hope to do a summer camp with children from the local orphanages.  They were having a Disney themed night so we sent our Mickey ears with him to be used somehow. 

While he was there he totally connected with two sweet girls.  Here is Sonja with the Mickey ears. 

She reminded him of our youngest daughter  - smile, heart and fiestiness and all!   She was so excited to get and keep the mickey ears and he was so happy to be able to bless her with them!  It's nice to see how something so simple that we create with our scraps can come to bless others all over the world.


Thursday, April 18, 2013

Cricut Party - Wise Old Owl!


Whether you use one Cricut®-cut piece or several, you can create cute party favors and decorations using your Artiste cartridge. Combine your Cricut® pieces with unique stamping techniques and you have projects that will knock your guests’ socks off! Want some recipes and tips for how to make this adorable artwork? Below are instructions for creating two pieces from the “Clearly the Best: How to kiss—with stamps” episode. Combine the Cricut®-cut pieces for these projects with the kissing stamping technique taught in the video, and you have a stellar 3-D item! Want to learn more about the kissing stamping technique? Watch this video

Recipes and Tips

Party Banner
Stamp set of your choice
X5668 Honey Cardstock
X5764 Pear Cardstock
1272 Cranberry Cardstock
Z2197 Pear Exclusive Inks® Pad
Z2163 White Daisy Exclusive Inks® Pad
Z1751 Baker’s Twine Harvest Assortment
Z1311 1¼” Circle Punch
Cricut® Shapes:
Artiste
1″ Shift+3D Object (cut 56, p. 57)

Art Tip! This banner only uses one type of Cricut® shape, but the finished product is still stunning. Use stamp kissing to randomly stamp across the pieces using the stamp set of your choice. Score with the help of the Cricut®-cut score lines on the shape and piece together to create little globes. Tie together with baker’s twine and voila!

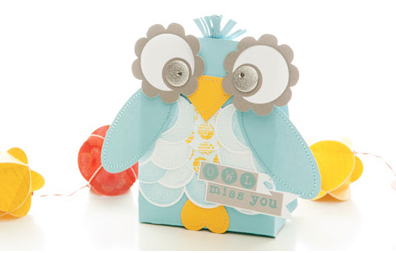
Owl Miss You Bag
1385 White Daisy Cardstock
1292 Crystal Blue Cardstock
X5668 Honey Cardstock
X5930 Slate Cardstock
Z2162 Honey Exclusive Inks® Pad
Z2117 Crystal Blue Exclusive Inks® Pad
Z1349 Shimmer Designer Brads
Z1752 Sparkles Clear Assortment
Z1311 1¼” Circle Punch
Twist Ties
Thread
Cricut® Shapes:
Artiste
4½” 3D Object (p. 77)
4½” Shift+3D Object (cut 2, p. 77)
1″ Shift+Accent 2 (p. 51)


Art Tip! This project uses many Cricut® shapes and all the pieces coordinate so nicely for an adorable finished product. Use the Artiste assembly booklet to put the bag together and then add the embellishments. The feathers are created with punched circles that are stamped using the kissing technique; however, if you don’t have the circle punch, you can easily make these using the Cricut as well. The eyes were created using Shimmer designer brads, but you can use any large brad or button to create the same look. Finish with the “owl miss you sentiment” for a special touch.
Don’t have the CTMH Cricut Cartridges?  The wise ole owl says- Click here for more info!

Thursday, August 23, 2012

Cricut Artiste is EASY!!!

Our new Cricut Artiste is Hot, Hot, HOT!!!!!!  I absolutely love the cartridge and where I would never make a box or gift bag before, I can have something super easy and super cute in a matter of minutes.  If the whole idea of boxes, bags, banners, flowers and party favors from a simple pieces of paper confuses you - watch this quick video where Brian explains how the cartridge and booklets work together to create fabulous projects.  It is super easy with even more explanation then ever before; Look even a man can do it! :)


Here is one more quick video that corporate made to explain how the coordinating images use the same size on the size dial for all the cut pieces - like eyes on a halloween bag.


If you are ready to get your hands on your own Artiste Cartridge, click here to order yours now.

And, don't forget about our September 8th all day crop.  I will have my Artiste Cartridge at the crop for us all to use and create with.  Hope to see you there!

Sunday, August 5, 2012

Decorate for a quick, fun Space Party!

Love this new video CTMH created showing off our new Cricut Artiste cartridge.  Their are so many themed buttons on this cartridge and so much can do with them that you will be thinking up reasons to have a party. 


To get your cartridge with 698 unique images on it, click here.